Saturday, 5 July 2014

Time for reflection

After some glorious sunny weather, rain was forecast so I took time off from the garden to go to Truro Cathedral to see an exhibition of quilts entitled Saints of Cornwall. The quilts were made by Cornish quilting groups from all over the county. Each group chose a saint connected to their own little bit of Cornwall, and each one designed their own quilt which, due to the limitations of the display area, had to be made to a designated size.

The standard of the work was very high and it was very interesting to see how the various groups had approached the design process and also to see the enormous variety of materials and techniques used.  The lighting in the cathedral was poor and they had requested no flash photography and so my photos were not wonderful! Here are a few to whet the appetite!


 This lovely Celtic cross looked so real it was difficlut to believe it was not made out of stone!


Apart from the rather gruesome stabbing, this quilt was a delight and was full of machine embroidered motifs and embellishments.


This quilt contained lovely images and text and had been beautifully free machine quilted with what looked to be metallic threads!
Another Celtic cross. This one was made by Lynn Carr a CQ member!


This quilt from the Scilly Isles was lovely, especially the boat. See the rather out of focus close up below for an idea!


This quilt was my favourite because it was such an original design and very much to my taste as a contemporary quilter. Made by Caroline Richards and Susan Hooper who are both CQ members.
For more and much better photos there is a link to their blog Beyond Patchwork here


This quilt also stood out because of its really original design and very restricted pallette. the black and white truly reflecting the Cornish flag.


Very uplifting to see the quilts in the setting of such a lovely building. It must have taken a lot of organising to get all the quilts finished in time and to the right size so congratulations to everyone who took part.

Now the sun is out, so before I get back to my latest project I'm off to do a bit of weeding!


Sunday, 22 June 2014

Grubby hands again!

A wonderful workshop at the Embroiderers Guild with Art Van Go showing us how to use discharge paste. It was a very hot day so we all struggled a bit, but at least we could get our fabric dry quickly! viv showed us how to use the paste on black discharge cotton and also on cotton dyed withrocion dyes. Once the colour was taken out, we then worked on putting colour back in with more dye and fabric paint.

It was great fun and very inspiring and my pieces were OK if nothing special. If I was using this technique for a project, I would need to do some detailed planning. This wasn't possible on the day, so the results were a bit hit and miss.

So I've been busy dyeing some more fabric as my stash of hand dyes was getting a bit depleted. Quite why I bought some mixed dye colours I can't now remember. As Procion dyes are easy to mix and you can get just about every colour you need from just 6 colours it is a bit of a waste, but I've decided to use them anyway and see what happens.

Here is my gradation using black currant.

I'm not totally happy with the way the colour has taken. The darkest is much bluer than any of the others and looks like a completely different hue. Also when rinsing, some of the blue component must still have been active as there are some blue spots on the lighter fabric which only appeared after washing.

Judging by the look of the dyed fabric, some of it seems to be poly cotton. Not sure how that happened, but I did take the fabric pieces out of the scrap bag so it's possible there was some in there. It just shows that procion dyes will work on poly cotton which might be useful to know!


 Yesterday was spent getting lots more fabric dyed. I'm using Jo Lovelock's method for dyeing a family of tones using two colours. I've chosen Lemon yellow for the first colour and have dyed 12 pieces of fabric. Four each of dark, medium and light and these are flapping away on the washing line. Even though there was a huge difference in the quantities of dye used, the colours are pretty similar! Never mind it's all good experience! The second colour is slate blue and this is also dark,medium and light so at the end there is a wide range of values in a mix of hues.


There was very little difference between the medium and light yellow and so the range of colours is a bit more limited than I wanted, but still there is enough here for me to work on a series of journal quilts.

So now for the not so successful. I decide to follow the recipes for complex colours in Helen Deighans book mixing magenta, turquoise and yellow in various combinations. Before rinsing the colours looked really good, but after washing it seemed that the magenta component had completely disappeared leaving some truly wishy washy colours. I don't know what went wrong so have tried a test piece just using magenta which seems to have worked.

One question I cannot find an answer to is, why do I continue to dye my skin such lovely colours even though I wear rubber gloves! The dye seems to get everywhere so today I have blue and yellow patches on my arms and magenta fingers!

I'm not sure what to do with the wishy washy fabric but will wait and see. Lots to be getting on with in the garden because the peas need picking, podding and freezing. Broad beans are beginning and the calabrese is hearing up! 

Monday, 26 May 2014

Embroidery 5 quilting 0!

We are a long way away from the mainstream here in Cornwall, but the local branch of the Embroiderers Guild is very active, unlike the Quilters Guild, which isn't. So having been part of the QGBI and the CQ group for a long time and a member of two lovely active quilting groups back in Leeds, it was sad to feel that I'd lost out by moving away so I went along to an EG meeting just to see what it was like.

Actually, it felt like coming home! Everyone was so friendly and welcoming and not only was the programme inspiring, there are lots of get togethers outside the meetings and a  wide range of talents and tastes. So I joined and haven't regretted it.

When I saw that Jean Littlejohn was booked for a two day workshop in May, my mouth really started watering, but sadly there were no places left. I was encouraged to put my name on the waiting list but didn't hold out much hope of getting a place. Still, I had a ticket for the talk she was due to give and thought that at least I'd get to see some of her beautiful work.

But then, I get the phone call a couple of days ago. A place had come free and would I like it? Would I like it? You mean you felt I needed to be asked!!!

So I duly got everything on the requirements list together and packed it all in. We were going to be using an embellisher, which I don't have, but I do have an embelleshing attachment for my sewing machine, so I got that fitted and off I went to the talk.

Jean is a lively and entertaining speaker and very generously shared lots of information about techniques she and Jan Beaney used. She mentioned the requirements for the following day and said, don't bother to bring loads as I have just about everything with me!


So after I got home, I repacked my bags leaving out a lot of stuff that I thought would be essential and realised I wouldn't need and putting in some more yarns that I could see would be useful. In the end, all it used was a bit of my yarn and my scissors! I really needn't have taken anything else at all!


So after an introductory talk we got going on the stitching. Jean showed us how to use stitches to create texture and this is central to her work. She asked us to use just one stitch, raised chain band but to have a design in mind. Mine was based on a drawing of tree bark and  used some very thick knitting yarn which took me way out of my comfort zone.


This is work in progress and not a very good photo I'm afraid.


The next technique Jean showed us was to use Solusheet, which is a dissolvable fabric, to create a background for further stitching. The idea is to cover the fabric with large stitches making sure that the stitches cross over each other. Then the stitching is worked on using an embellisher which has the effect of creating a "felted" surface. The piece is then put in water to dissolve the fabric and once it is dry it can be stitched into and further embellished.


Taking this further, Jean showed us how to make a rich surface by ironing bondaweb onto the stitching and adding gold foil. This was then covered with a nylon scarf before distressing it all under the embellisher. This opens up a world of possibilities for making rich and complex surfaces that can then be stitched into. Both Jean and Jan use this method to make very large pieces of work but our pieces were very small. I wasn't very happy with the way my first piece turned out. My initial stitching was so dense that it took a long time for the embellisher to get it distressed sufficiently and then it wasn't possible to wash out all the Solusheet.


The lttle piece on the left is my attempt at building an embellished surface and I used detached chain stitch as the final stitching.

All in all an exhausting couple of days, but lots of new things learned and lots of fun with some lovely people. One thing I did learn is that my embellisher attachment can't cope with this kind of surface which is a bit of a shame because it means that now I just have to get a proper embellisher! The things we are forced to do for art!!!!

One tip Jean gave us which has really made me think and this was to do what you love, otherwise you won't finish it and it will languish in the UFO box. So although I love quilting, at heart I think I'm truly an embroiderer. I'm glad to have got that sorted out at last!!!

Wednesday, 30 April 2014

And a few more......

We seem to have spent a long weary winter waiting for some good weather and at last we've had some! My DD and family arrived last week and brought the sun with them so we were able to get out and about and everyone had a thoroughly good time!

We have dipped our toes in the sea, sampled some delicious pub food, got quite a lot of chocolate, relieved several beaches of pebbles that were just lying there and groomed Sophie, our neighbours horse! It's always lovely to see them, and although it's sad to see them go, they will be back before too long!


The break from my designing activities has done me good and now I'm ready to get stuck in again. Two small pieces are finished and may be suitable for the layers challenge if all else fails. My design for the CQ challenge is beginning to take shape, but as this will be a juried show, I have some doubts about whether my piece will be accepted.

Having signed up for a dyeing course I have been increasing my stash of hand dyed fabric. One of the exercises was to look at the quilts you had made and make a list of the colours used. All but a tiny few of my previous quilts used commercial fabric and although I may have chosen colours that coordinated, I wouldn't say that I could define an intentional colour scheme in any of them! This is probably why I've never really felt satisfied with my work, but now I am beginning to think about  this a bit more.

My first dyeing task was to dye a range of values from light to dark using black dye. Not entirely satisfactory outcome especially since I managed to dye my fingers black!  Yes I know about gloves, but I didn't expect the lid of the jar to fly off when I was shaking it to dissolve the dye powder.

The method this tutor suggested was quite different from any I had used before, but what I found interesting was that the results were not much different from previous attempts using different methods. This set me thinking that, in reality, it is much better to find a method that gives the results you need, rather than worrying about whether it is the "right" one!


Two different methods giving slightly different results. At least I now have a lot of fabric in shades of black and grey and I've used them in my first four journal quilts, uploaded today in the nick of time!


I'm trying to get to grips with the technique of inserting really thin strips and it will take some practice. The next step will be to work on using different values to create the optical illusion of transparency.

For now though, we're back in the garden looking after out veggies and our new plants.!


Thursday, 3 April 2014

Some grand days out!

The weather forecast for Sunday was good, so we took ourselves off to Caerhays 
Gardens to have a look at the Magnolias and Camelias. It was a bit muddy underfoot, but the flowers were wonderful. A carpet of primroses in cream pink and white greeted us as we walked up the hill and all the camelias were in full bloom.


This oddity turned out to be a Korean Pine. The flowers were really lovely and such an unusual colour. A must have for our new garden!

So after several days of wet and gloomy weather, today I took myself off to Wheal Martyn China Clay Museum with the Textile Plus group.

Walking around the grounds passing by all the old trains and machinery was truly inspirational. The birds were signing, the sun shone and there was coffee and cake in the cafe!

 This may have been a water feature, but is made out of old shovels! Magic!


 Lots of rust and textures!


And a little but of nature peeping out from a crack in the wall!


There is still a working clay pit here and we sat and watched the men working for quite a while until this little rusty chap caught our eye! Not sure how many elephants you get in a Cornish Clay Pit!


Lovely turquoise water to finish our walk and then back to the cafe for a cup of tea!


Next up is getting all this inspiration together to make something for our exhibition next year. Lots of ideas swimming around but nothing concrete as yet. I still find it difficult to think that other people have the same difficulty getting their ideas to take shape as I do. Yet there were three of us looking over the clay pit all saying, well it's lovely but I don't know where to start. In a way it's reassuring to think that I'm not alone. Back in the cafe over a cup of tea, we were all chatting away talking about what we had seen and I began to feel really inspired. That's the great thing about being part of a group like this. With lots of different ideas floating around you start to think well any things possible!

So off to the paint box!

Wednesday, 5 March 2014

The earth moves again!

We are getting thoroughly fed up with all this rain. Where is it all coming from? I know where it's going as we are surrounded by seas of mud!

Our trusty earthmovers dug a trench for a drain on Friday and excavated a large hole at the front which will eventually be levelled up with our spanking new drive way. They have removed tons of earth and a very dilapidated fuchsia which had long since passed its best and today they are in the process of levelling the hard core and tamping it down while the rain falls! They are coming back "dreckly" to finish it all off with nice chippings and Tarmac. "Dreckly" being the Cornish version of mañana! Still with it all levelled and hardened off at least we will not be paddling to the car through a muddy lake!

On the artistic front I have been busy. Yesterday I attended a workshop with Susan Denton learning about colour. Susan is a well known quilter who was a member of Quilt Art but has not run classes for a while. The exercises she set us were very challenging but she made sure that everyone understood the tasks and spent a lot of time helping us individually and as a group. Susan had provided us with all the fabric we were likely to need and everyone came away having learned a great deal.

Here are some photos of my exercises


We chose 1 light, 1 dark and 1 medium fabric. In my first sample I chose the lime green as my light fabric and in the second, as my medium. The result is that the medium fabric looks darker on the light fabric and darker on the light. This can be a useful way of manipulating the colour.

In the next exercise we chose two medium fabrics, one slightly darker than the other. In this way it is possible to make the two medium colours look as if they were the same simply by using a light or a dark background. Mine didn't quite work on the light fabric, but sort of did on the dark.


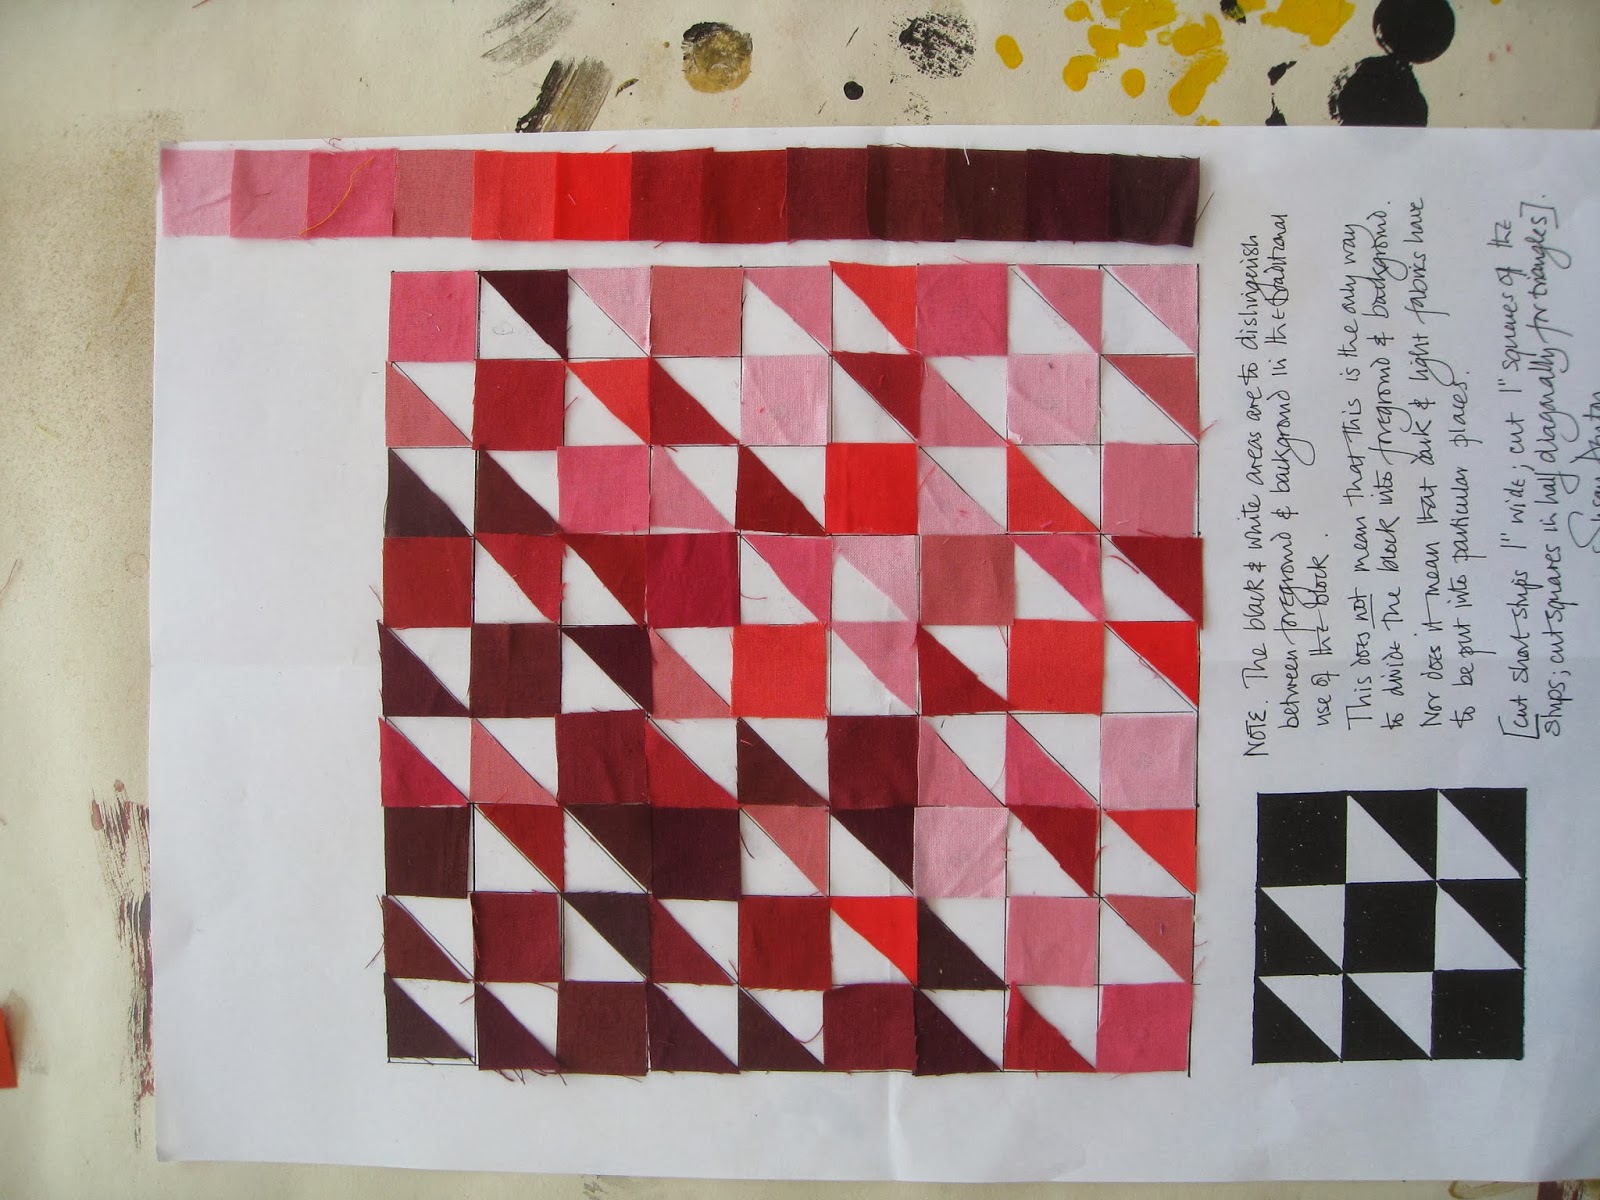
 The final exercise was to choose 12 to 16 fabrics and grade them in even steps from light to dark! This is a black and white photo of my choices, which wasn't bad, but not perfect.


We then had to cut out small squares and triangles and stick them on a background drawn out as a traditional block.


The task was to place the fabrics in such a way that it moved from dark to light across the  block, but in a random way. Not sure about my result so I may do another one before the next class on Monday.

Hard work, but my it was fun!!!

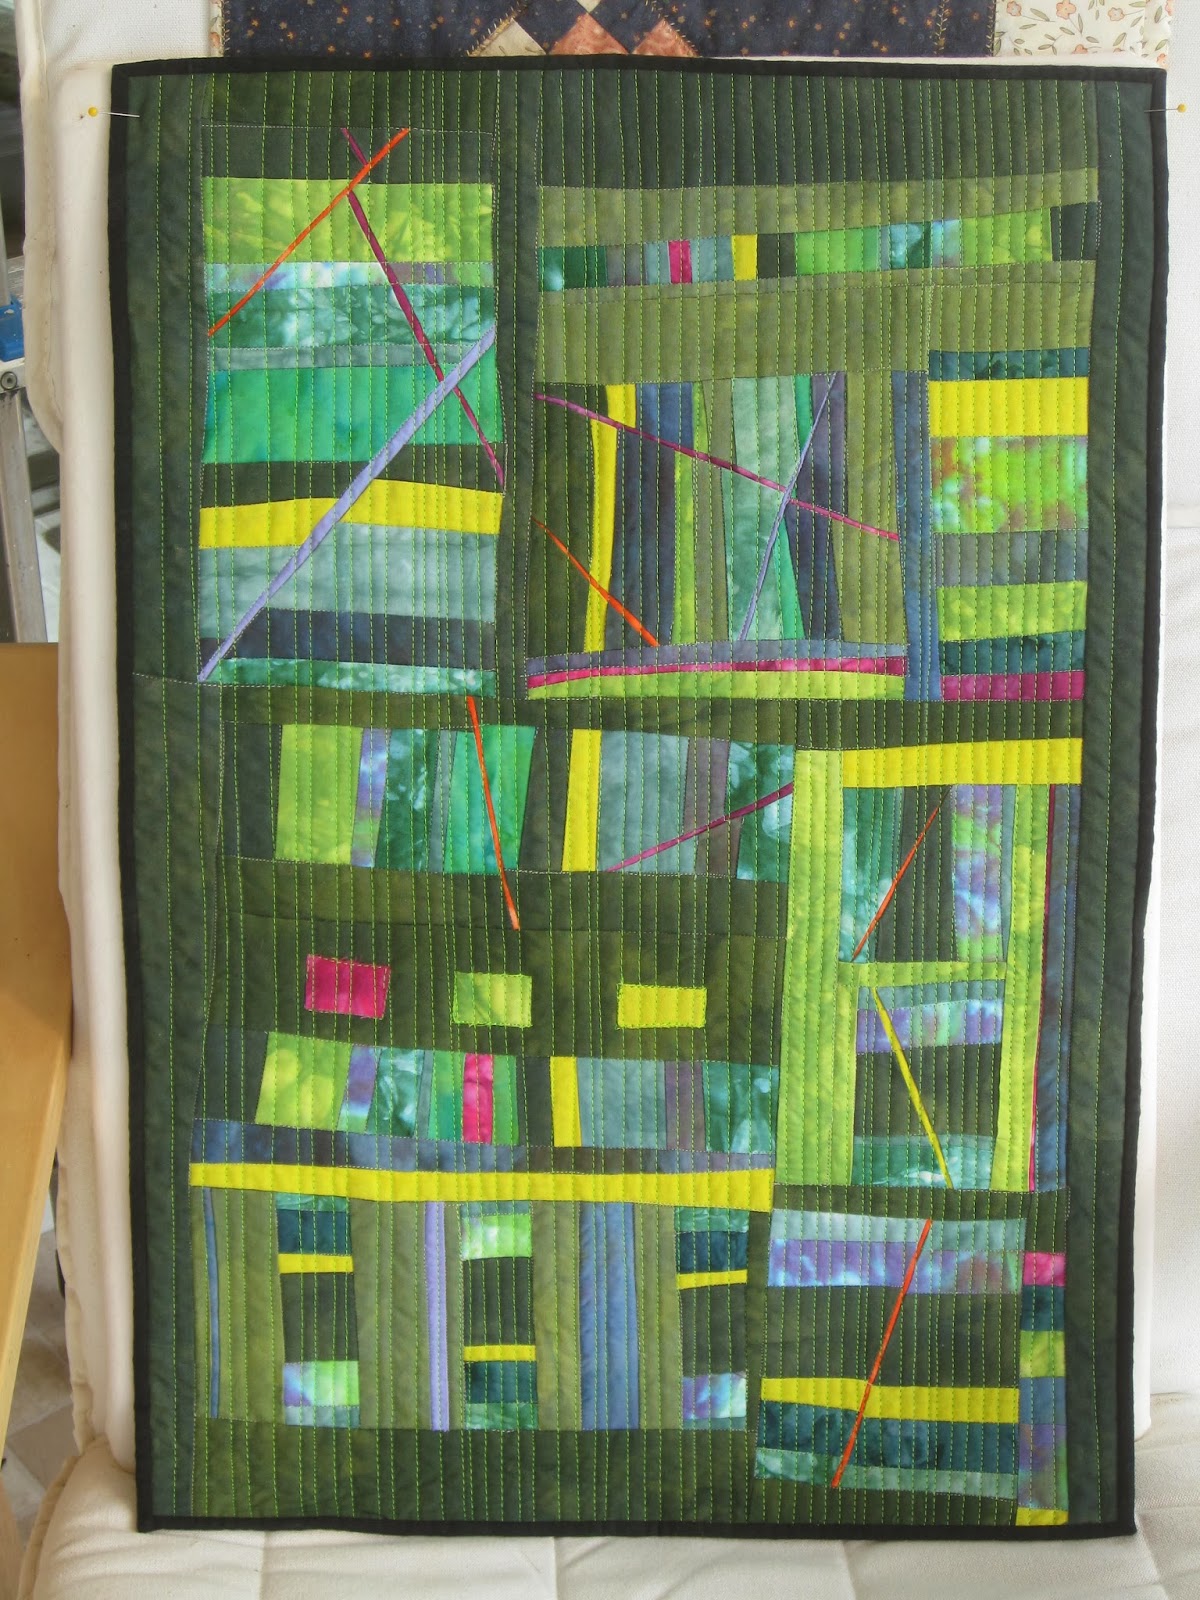
My quillt for the Quilters Guild "Green" challenge is finished and is winging it's way to Exeter and it does look quite good.


Next up is the serpentine panel which is giving me a few headaches but I think I'm getting there. This is the photo I'm using so it should be quite dramatic.


Watch this space!